
Ever spent $300+ on cloud server costs just to host a basic personal website? Yeah, me too. Then I discovered how a $35 Raspberry Pi sitting on my bookshelf could replace all that nonsense.
Setting up a Raspberry Pi server might sound like something only tech wizards attempt, but it’s actually shockingly accessible – even if you’ve never touched a command line before.
In this step-by-step guide, I’ll walk you through transforming that tiny computer into a powerful home server that can host websites, store files, or even manage your smart home. No computer science degree required.
The best part? Once you see how simple this actually is, you’ll wonder why you didn’t try it sooner.
Getting to Know Raspberry Pi
What is Raspberry Pi and why it makes a perfect server
You’ve probably seen a Raspberry Pi before—that credit card-sized computer that costs less than a nice dinner out. But what makes this tiny machine such a rockstar for home servers?
At its core, a Raspberry Pi is a fully functional computer packed onto a single circuit board. It has everything you’d expect: processor, RAM, ports for connecting things, and the ability to run a proper operating system. The magic is in how it delivers all this computing power while sipping electricity (about 5 watts) and staying whisper-quiet (no fans needed).
For servers, this is a game-changer. Your Raspberry Pi can run 24/7, handling tasks like:
- Storing and sharing your files across devices
- Hosting your personal website
- Managing your smart home
- Running media servers to stream your movies
- Blocking ads for your entire home network
And the best part? It’ll add pennies to your electricity bill, not dollars. Try that with a traditional server.
The learning curve isn’t steep either. If you can follow simple instructions, you can set up a Pi server. No computer science degree required.
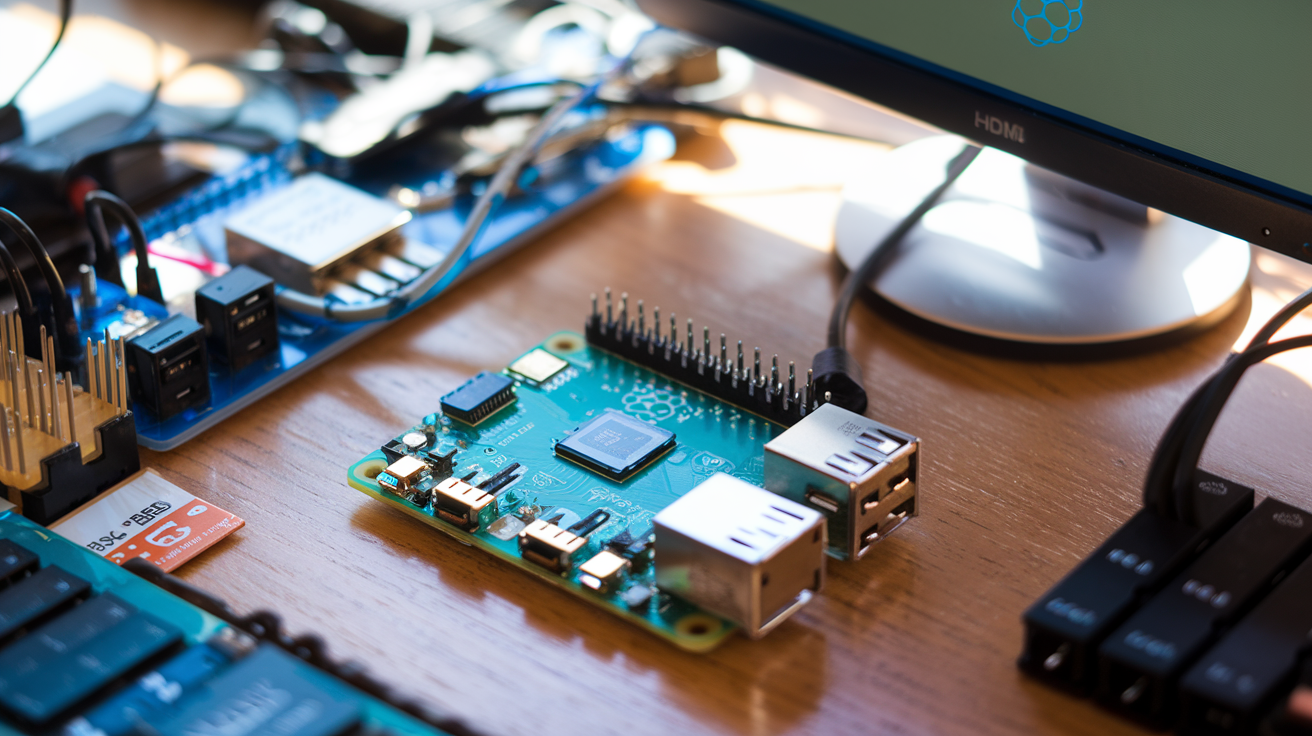
Key hardware components explained for beginners
Got your Pi in hand but feeling overwhelmed by all those pins and ports? Let’s break it down:
The brain stuff:
- Processor (CPU): The main chip that does the thinking. Recent Pi models use quad-core processors that can handle multiple tasks at once.
- RAM: Where your Pi keeps the information it’s actively using. More RAM = smoother multitasking.
The connection points:
- USB ports: Connect keyboards, mice, external drives—just like a regular computer.
- Ethernet port: For wired internet connection (faster and more reliable for servers).
- HDMI port: Connects to a monitor during setup (you can go “headless” later).
- GPIO pins: Those mysterious pins along the board let you connect sensors, lights, and other hardware components.
Storage:
- microSD card slot: This is where your operating system lives. Think of it as your Pi’s permanent memory.
Power:
- USB-C or micro-USB power port: Powers your Pi (newer models use USB-C).
The beauty is you don’t need fancy accessories to get started. A basic power supply, microSD card, and network connection are enough for a headless server setup.
Different Raspberry Pi models and which to choose for your server
Walking into the world of Raspberry Pi can feel like learning a new language. Pi 3, Pi 4, Zero W—what’s the difference? Here’s your translation guide:
Raspberry Pi 4 B – The current flagship model comes in 2GB, 4GB, and 8GB RAM versions. For server applications, this is usually your best bet because:
- It has true Gigabit Ethernet for faster network transfers
- USB 3.0 ports for speedy external storage
- Enough processing power to handle multiple server applications
Raspberry Pi 3 B+ – The previous generation still works great for lighter server loads:
- Cheaper than the Pi 4
- Less power consumption
- Sufficient for basic file sharing or simple web hosting
Raspberry Pi Zero W – Ultra-compact and dirt cheap:
- Perfect for single-purpose servers (like ad-blocking)
- Very low power consumption
- Limited by its single-core processor and 512MB RAM
Here’s a quick comparison for server use:
| Model | Best For | Limitations | Price Range |
|---|---|---|---|
| Pi 4 (4GB+) | Multi-purpose servers, media streaming, virtualization | Higher power needs, generates more heat | $55-75 |
| Pi 3 B+ | Basic file servers, web hosting, IoT hubs | Slower network speeds, less multitasking ability | $35-45 |
| Pi Zero W | Single-purpose servers, network monitoring | Very limited processing power, no Ethernet port | $10-15 |
For most home server projects, the Pi 4 with 4GB RAM hits the sweet spot of power and price. But if your server needs are minimal or you’re on a tight budget, the older models can still get the job done.
Gathering Your Essential Equipment
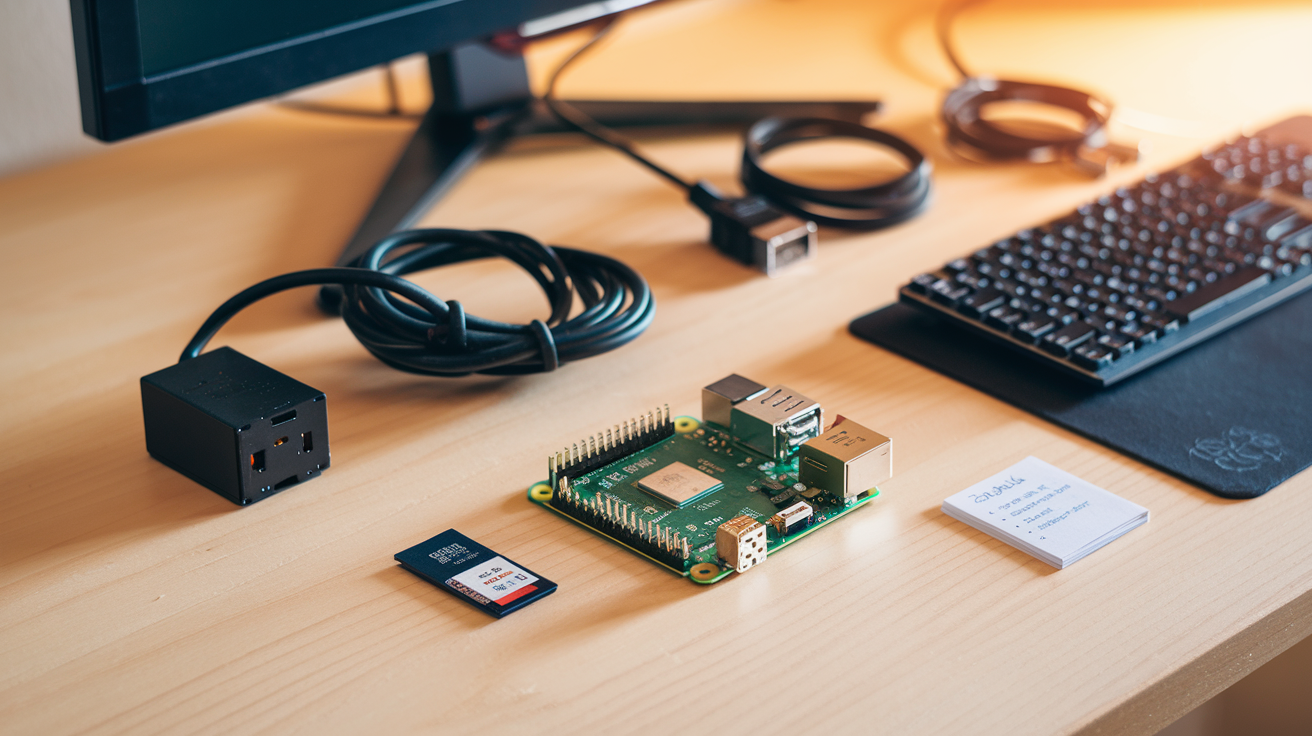
A. Required hardware checklist with budget options
Starting a Raspberry Pi server doesn’t have to break the bank. Here’s what you absolutely need to get going:
| Essential Hardware | Budget Option | Mid-Range Option | What It Does |
|---|---|---|---|
| Raspberry Pi | Pi 4 Model B (2GB) – $45 | Pi 4 Model B (8GB) – $75 | The brain of your server |
| MicroSD Card | 32GB SanDisk – $8 | 128GB Samsung EVO – $20 | Stores your OS and data |
| Power Supply | Official Pi USB-C (5.1V/3A) – $10 | Argon ONE PSU – $15 | Keeps your Pi running |
| Ethernet Cable | 3ft CAT5e – $3 | 6ft CAT6 – $7 | Connects to your network |
| Case | Basic plastic case – $5 | Argon ONE M.2 case – $45 | Protects and cools your Pi |
Skip the fancy stuff when starting out. I tried running a Pi without a case once, and let’s just say my cat found the blinking lights way too interesting. Not a risk worth taking!
B. Recommended accessories that improve server performance
Once you’ve got the basics, these add-ons will seriously level up your Pi server:
Cooling solution: Passive aluminum heatsinks ($5) are good, but a small fan ($8) is better. Overheating kills performance faster than anything.
External storage: A 1TB external HDD ($50) or SSD ($90) will expand your storage capabilities dramatically. Your server needs somewhere to actually store all that data!
UPS (Uninterruptible Power Supply): Even a small UPS ($40) can save you hours of headaches from random power outages. Nothing worse than corruption from improper shutdowns.
USB hub with individual power switches: About $15, but incredibly useful for connecting multiple devices and troubleshooting them independently.
C. Software tools you’ll need to download before starting
Grab these before you even power up your Pi:
Raspberry Pi Imager: This official tool makes flashing your OS to the SD card stupidly simple. Available for Windows, Mac, and Linux.
PuTTY (Windows) or Terminal (Mac/Linux): You’ll be using SSH connections a lot, so get comfortable with these.
Advanced IP Scanner: Helps you find your Pi on the network when you first boot it up.
WinSCP (Windows) or Cyberduck (Mac): For transferring files to/from your Pi server.
VNC Viewer: For those times when you need a remote desktop connection rather than just command line.
I always keep these installers on a USB stick specifically for Pi projects. Saves so much time hunting them down every time.
D. Power supply considerations for 24/7 operation
Your Pi server is going to run constantly, so power matters more than you think:
Get the right specs: For a Pi 4, you need at least 5.1V/3A with a USB-C connection. Anything less and you’ll see the dreaded lightning bolt icon of doom.
Quality matters: Those $2 chargers from the gas station? They’ll fry your Pi. Spend the extra $8 for an official or high-quality third-party option.
Consider a powered USB hub: If connecting multiple drives, get a powered hub so you’re not drawing too much from the Pi itself.
Surge protection is non-negotiable: A basic surge protector costs $15 and can save your $75 Pi. Simple math.
Monitor power consumption: A cheap USB power meter ($10) can help you ensure your setup isn’t drawing more than expected.
The biggest mistake new Pi enthusiasts make is underestimating power requirements. I learned this the hard way when my first server kept randomly rebooting at 3am – turns out the cheap power adapter couldn’t handle the sustained load.
Initial Setup and Operating System Installation
A. Preparing your microSD card for installation
Getting your Raspberry Pi server up and running starts with preparing your microSD card properly. Skip this step, and you’ll be scratching your head wondering why nothing works.
First, grab a microSD card – 16GB minimum, but 32GB or larger gives you more breathing room. Speed matters too! Go for Class 10 or UHS-I cards for better performance.
You’ll need to format the card before installing any operating system. Here’s how:
- Download the SD Card Formatter tool from the SD Association website
- Insert your microSD card into your computer (using an adapter if needed)
- Open the tool, select your card (double-check it’s the right one!)
- Choose “Quick Format” and name it “RPIOS” or something you’ll recognize
- Hit format and wait for the process to complete
Already have stuff on your card? Back it up first! The formatting process wipes everything.
B. Step-by-step guide to installing Raspberry Pi OS
Now for the fun part – getting the operating system onto your freshly formatted card.
- Download the Raspberry Pi Imager tool from raspberrypi.org
- Launch the imager and click “CHOOSE OS”
- For a server setup, select “Raspberry Pi OS Lite” (no desktop environment needed)
- Click “CHOOSE STORAGE” and select your microSD card
- Before clicking “WRITE,” hit CTRL+SHIFT+X to access advanced options
- Here’s where the magic happens:
- Enable SSH (essential for headless server setup)
- Set hostname (like “pi-server”)
- Create a username and password (please don’t use “raspberry” as your password!)
- Configure WiFi if needed
- Click “SAVE” then “WRITE” and confirm
- Wait for the writing and verification process to complete
When it’s done, you’ve got a bootable microSD card ready for your Pi!
C. Alternative server-focused operating systems worth considering
Raspberry Pi OS isn’t your only option. Depending on your server needs, these alternatives might serve you better:
DietPi
Super lightweight and optimized for headless server use. Comes with an amazing software installer that makes adding services like Plex, NextCloud, or Pi-hole ridiculously simple.
Ubuntu Server
Familiar territory if you’ve used Ubuntu before. Rock-solid stability and excellent package management. The ARM version runs beautifully on Pi 4 models.
OpenMediaVault
Your go-to if you’re building a NAS (Network Attached Storage). Pre-configured file sharing options and a slick web interface make storage management a breeze.
This comparison might help:
| OS | Best For | RAM Usage | Learning Curve |
|---|---|---|---|
| Raspberry Pi OS Lite | General server use | Low | Easy |
| DietPi | Minimal resource use | Very Low | Easy |
| Ubuntu Server | Advanced server applications | Medium | Medium |
| OpenMediaVault | NAS and media servers | Medium | Medium |
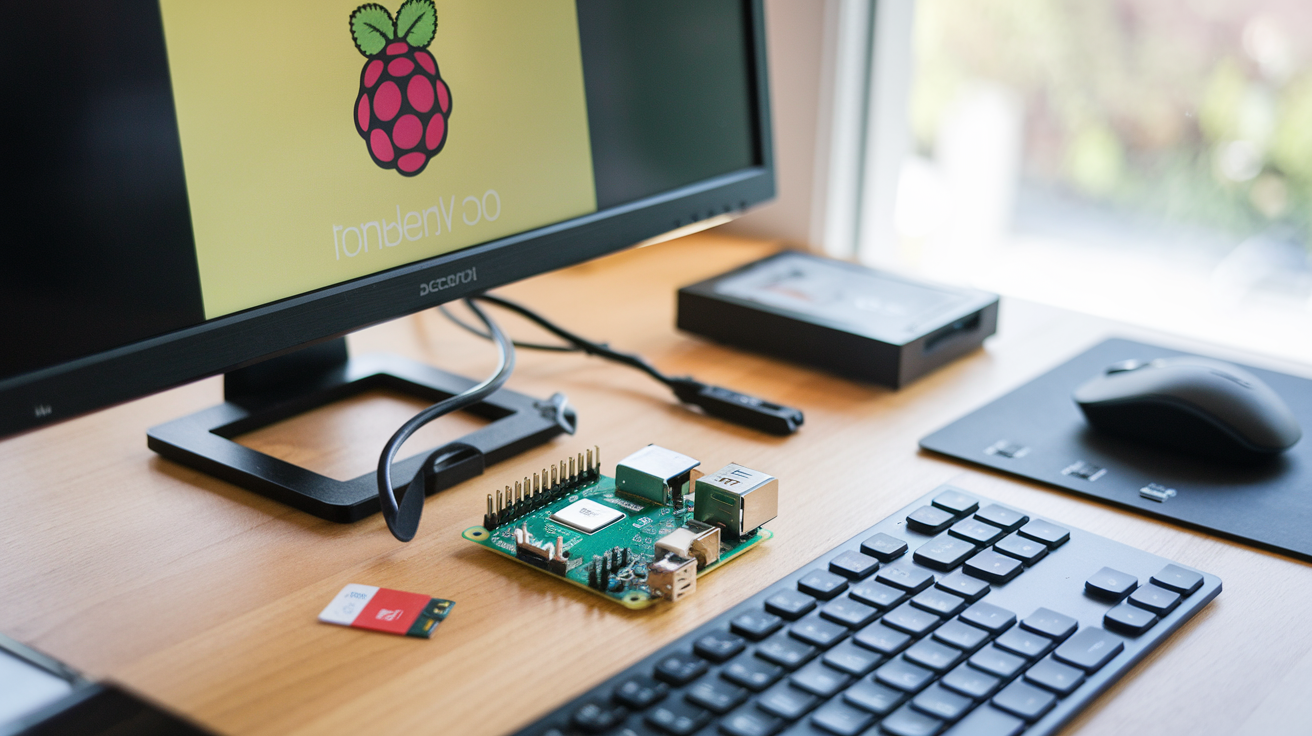
D. First boot configuration for optimal server performance
Your Pi is about to spring to life! After inserting the microSD and powering up, you’ll want to optimize it for server duties.
SSH into your Pi using:
ssh username@hostname.local
Once connected, run these commands:
sudo apt update
sudo apt upgrade -y
sudo apt install -y fail2ban htop
For better performance:
- Disable unnecessary services:
sudo systemctl disable bluetooth.service - Reduce GPU memory (servers don’t need graphics):
- Edit
/boot/config.txt - Add
gpu_mem=16
- Edit
- Set up a static IP address by editing
/etc/dhcpcd.conf
Consider overclocking if you’re running resource-intensive services. Add these lines to /boot/config.txt for a modest, stable overclock on Pi 4:
over_voltage=2
arm_freq=1750
E. Setting up remote access to manage your server
Nobody wants to keep a keyboard and monitor permanently attached to their server. Remote access is your best friend.
SSH access should already be enabled if you used the advanced options in the Raspberry Pi Imager. If not, create a file named ssh (no extension) in the boot partition of your microSD card.
For enhanced security:
- Set up key-based authentication:
ssh-keygen -t ed25519 ssh-copy-id username@hostname.local - Disable password authentication by editing
/etc/ssh/sshd_config:PasswordAuthentication no - Change the default SSH port (22) to something else to avoid automated attacks
Want graphical remote access? Install VNC:
sudo apt install -y realvnc-vnc-server
sudo raspi-config # Enable VNC in Interfacing Options
For web-based management, check out Webmin:
sudo apt install -y perl libnet-ssleay-perl openssl libauthen-pam-perl libpam-runtime libio-pty-perl
sudo dpkg -i webmin_*.deb
Access your server’s Webmin interface at https://hostname.local:10000
Network Configuration for Server Access

A. Configuring a static IP address for reliable connections
Tired of your Raspberry Pi changing its IP address every time you restart it? Yeah, that gets annoying fast.
By default, your Pi uses DHCP, which basically means it asks your router for whatever IP address is available. That’s fine for regular use, but for a server? Not so much. You need that address to stay put.
Here’s how to fix it in just a few minutes:
- Find your current network settings:
ip addr show
- Edit the dhcpcd configuration file:
sudo nano /etc/dhcpcd.conf
- Add these lines at the bottom (customize with your network info):
interface eth0
static ip_address=192.168.1.100/24
static routers=192.168.1.1
static domain_name_servers=192.168.1.1 8.8.8.8
Save the file, reboot your Pi, and boom – your server now has a permanent address on your network.
Pro tip: Choose an IP outside your router’s DHCP range (usually configurable in router settings) to prevent address conflicts. Your future self will thank you.
B. Setting up SSH for secure remote management
Nobody wants to keep a keyboard and monitor plugged into their Pi server all the time. That’s where SSH comes in – it lets you control your Pi from any computer on your network.
SSH is dead simple to set up:
- Enable SSH on your Pi:
sudo raspi-config
Navigate to “Interface Options” → “SSH” → “Yes”
- Connect from another computer:
ssh pi@192.168.1.100
(Use your Pi’s static IP from earlier)
But wait – using the default settings is like leaving your front door unlocked. Let’s secure things:
- Change the default password ASAP:
passwd
- Disable password login and use SSH keys instead:
Generate keys on your computer:
ssh-keygen -t rsa -b 4096
ssh-copy-id pi@192.168.1.100
Edit SSH config:
sudo nano /etc/ssh/sshd_config
Change these lines:
PasswordAuthentication no
PermitRootLogin no
Restart SSH:
sudo systemctl restart ssh
Now your Pi is accessible remotely but locked down tight. Much better!
C. Port forwarding basics for external access
Want to access your Pi server from outside your home network? Your router is the gatekeeper, and port forwarding is how you tell it to let specific traffic through.
The concept is straightforward: when someone tries to connect to your home IP address on a specific port, your router redirects that traffic to your Pi.
Setting it up:
Log into your router admin panel (typically 192.168.1.1 or 192.168.0.1)
Find “Port Forwarding” (might be under Advanced Settings)
Create a new rule with:
- External port: What the outside world will use (e.g., 8022)
- Internal port: What your Pi is using (e.g., 22 for SSH)
- Internal IP: Your Pi’s static IP (e.g., 192.168.1.100)
- Protocol: TCP/UDP (or both)
Common ports worth forwarding:
- 80/443: Web server
- 22: SSH (consider changing to non-standard port)
- 21: FTP
- 25565: Minecraft server
Warning: Once you open ports, you’re potentially exposing your Pi to the internet. That’s why we hardened SSH earlier – security matters!
D. Domain name options for easier server access
IP addresses are a pain to remember. “Hey, visit my website at 203.0.113.42!” Said no one ever.
Setting up a domain name means you can type something like “mypiserver.com” instead. You’ve got options:
Free dynamic DNS services:
- No-IP or DuckDNS give you a subdomain like “yourname.duckdns.org”
- Install their client on your Pi:
sudo apt install ddclient
- Configure it to update your IP automatically
Custom domain name:
- Buy a domain (Namecheap, Google Domains, etc.) – costs $10-15/year
- Point it to your home IP through your registrar’s DNS settings
- Consider setting up DDNS with your domain too (IPs change occasionally)
For extra credit, set up a local DNS server like Pi-hole, which gives you the bonus of:
- Using nice names on your local network
- Blocking ads network-wide
- Resolving local addresses even if internet is down
Remember: External domains only work when you’ve set up port forwarding correctly. They’re the friendly face of your technical setup.
Essential Server Security Measures
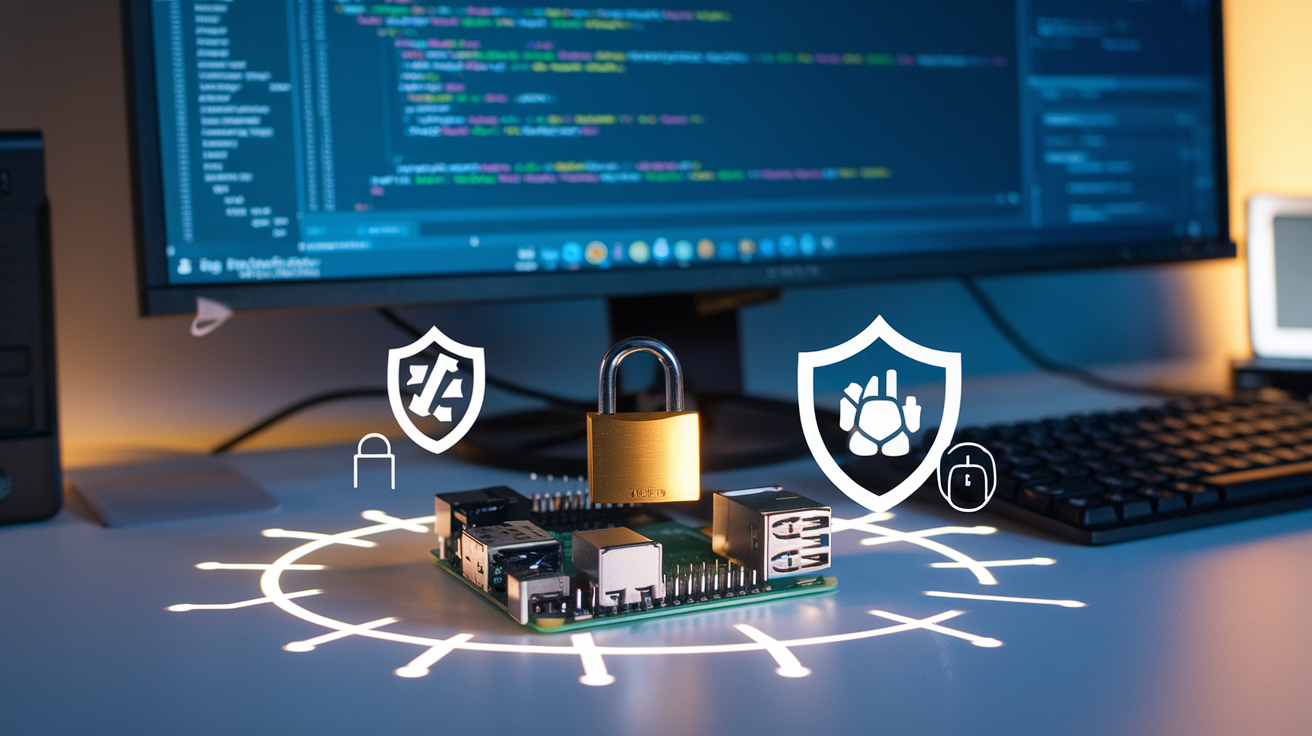
A. Creating strong user credentials and permissions
Security begins with good user credentials. The default Raspberry Pi username “pi” with password “raspberry” is like leaving your front door wide open with a neon “come on in” sign.
First thing you need to do? Change that default password:
passwd
Even better, create a new user with admin privileges and disable the pi user entirely:
sudo adduser yournewusername
sudo usermod -aG sudo yournewusername
sudo passwd -l pi
Think your password is strong enough? Unless it’s a random jumble of characters, numbers, and symbols that you’ve never used anywhere else, it’s probably not. Use a password manager and generate something that looks like a cat walked across your keyboard.
For file permissions, remember this mantra: give only what’s needed, nothing more. Check and adjust permissions with:
ls -la
chmod 750 /path/to/folder
B. Firewall setup to protect your Raspberry Pi
Your Pi without a firewall is like wearing a “hack me” t-shirt. UFW (Uncomplicated Firewall) is your new best friend:
sudo apt-get install ufw
sudo ufw default deny incoming
sudo ufw default allow outgoing
Only open ports you actually need:
# For SSH
sudo ufw allow 22/tcp
# For web server
sudo ufw allow 80/tcp
sudo ufw allow 443/tcp
Then enable it:
sudo ufw enable
Want to see who’s knocking on your Pi’s door? Check this:
sudo ufw status verbose
C. SSL certificate implementation for encrypted connections
Running services without SSL is basically shouting your data across a crowded room. Let’s fix that.
For web servers, Let’s Encrypt and Certbot make this painless:
sudo apt-get install certbot
For Apache:
sudo apt-get install python3-certbot-apache
sudo certbot --apache
For Nginx:
sudo apt-get install python3-certbot-nginx
sudo certbot --nginx
Self-signed certificates are also an option for personal use:
sudo openssl req -x509 -nodes -days 365 -newkey rsa:2048 -keyout /etc/ssl/private/selfsigned.key -out /etc/ssl/certs/selfsigned.crt
D. Regular update protocols to maintain security
Outdated software is a hacker’s playground. Set up a regular update schedule:
sudo apt-get update
sudo apt-get upgrade
sudo apt-get dist-upgrade
Automate it! Create a simple update script:
#!/bin/bash
apt-get update
apt-get -y upgrade
apt-get -y dist-upgrade
apt-get -y autoremove
Schedule it with cron:
sudo crontab -e
# Add this line to run weekly
0 2 * * 0 /path/to/update-script.sh
Check what packages need updating:
apt list --upgradable
E. Backup strategies to protect your server data
All the security in the world won’t save you from a corrupted SD card. Backup or cry later.
Use rsync for local backups:
rsync -av --delete /source/directory/ /backup/directory/
For automated backups to external storage:
sudo apt-get install rsnapshot
Configuration in /etc/rsnapshot.conf:
backup /home/ localhost/
backup /etc/ localhost/
Cloud backups with rclone:
sudo apt-get install rclone
rclone config
Don’t forget database backups if you’re running any:
mysqldump -u username -p database_name > backup.sql
Test your backups regularly by actually restoring from them. A backup you can’t restore is just wasted space.
Popular Server Applications to Install
Setting up a personal web server with Apache or Nginx
Got a Raspberry Pi and want to host your own website? You’re in the right place. Setting up a web server is probably one of the most popular uses for these tiny computers.
First, decide between Apache and Nginx:
| Feature | Apache | Nginx |
|---|---|---|
| Ease of setup | Slightly easier for beginners | Steeper learning curve |
| Performance | Good for dynamic content | Better for static content & concurrency |
| Memory usage | Higher | Lower (better for Pi) |
| Configuration | More user-friendly | More efficient but technical |
For Apache, installation is straightforward:
sudo apt update
sudo apt install apache2 -y
If you prefer Nginx (which I recommend for most Pi setups):
sudo apt update
sudo apt install nginx -y
After installation, your web server automatically starts. Type your Pi’s IP address into any browser on your network, and you’ll see the default welcome page. Magic!
All your website files go in /var/www/html/ – just replace the default index file with your own HTML, and you’re running your own website.
Want to make it accessible from anywhere? You’ll need to set up port forwarding on your router and maybe consider a dynamic DNS service like No-IP or DuckDNS.
Creating a media server with Plex or Jellyfin
Tired of paying for Netflix? Turn your Pi into a media powerhouse instead!
Plex and Jellyfin both transform your Pi into a streaming service for your personal media collection. Connect an external hard drive loaded with your movies and shows, and you can watch them on any device in your home.
Jellyfin is completely free and open-source, while Plex has a free tier with premium features available. Here’s how they compare:
| Feature | Plex | Jellyfin |
|---|---|---|
| Cost | Free basic / Premium $5/month | 100% Free |
| User interface | Polished, Netflix-like | Good but less refined |
| Device support | Excellent (almost everything) | Good (improving rapidly) |
| Resource usage | Higher | Lower (better for Pi) |
| Setup difficulty | Medium | Medium |
For Plex, visit plex.tv/downloads and grab the Raspberry Pi version. Follow their installer.
For Jellyfin:
sudo apt install apt-transport-https
sudo wget -O /usr/share/keyrings/jellyfin.gpg jellyfin.org/jellyfin_team.gpg.key
echo "deb [signed-by=/usr/share/keyrings/jellyfin.gpg] jellyfin.org/debian buster main" | sudo tee /etc/apt/sources.list.d/jellyfin.list
sudo apt update
sudo apt install jellyfin
After installation, access the web interface by typing your Pi’s IP address followed by the port (Plex uses 32400, Jellyfin uses 8096). Set up your libraries by pointing to your media folders, and you’re ready to binge!
Pro tip: For better performance, consider overclocking your Pi and adding a cooling solution. Media transcoding can push your little computer pretty hard.
Building a cloud storage solution with NextCloud
Why pay Dropbox or Google when you can host your own cloud storage? NextCloud turns your Raspberry Pi into your personal file sync and sharing platform.
Installation isn’t quite one-click, but it’s worth it:
sudo apt update
sudo apt install apache2 mariadb-server libapache2-mod-php
sudo apt install php-gd php-json php-mysql php-curl php-mbstring php-intl php-imagick php-xml php-zip
After installing the dependencies, download NextCloud from nextcloud.com and extract it to your web server directory. Run through the web-based setup, which involves creating a database and admin account.
What can you do with NextCloud? Pretty much everything you’d expect from commercial cloud services:
- Sync files across all your devices
- Share files with friends via links
- Collaborate on documents
- Create and manage calendars
- Store contacts
- Even run a basic email client
For serious usage, you’ll want to attach an external hard drive to your Pi for storage. A 1TB drive gives you a ton of space for a fraction of what cloud services charge.
The best part? Your data stays on YOUR hardware. No one’s scanning your files for advertising purposes or mining your data.
Hosting a simple game server for friends
Gaming with friends is better when you control the server. Your Raspberry Pi might not run Battlefield, but it’s perfect for many popular games.
Minecraft is the classic choice. The Pi can comfortably host a small server for 5-10 players:
sudo apt update
sudo apt install openjdk-11-jdk-headless -y
mkdir minecraft
cd minecraft
wget https://launcher.mojang.com/v1/objects/1b557e7b033b583cd9f66746b7a9ab1ec1673ced/server.jar
Create a startup script:
java -Xms512M -Xmx1G -jar server.jar nogui
Other great game options for Pi servers include:
- Terraria (using TShock)
- Minetest (open-source Minecraft alternative)
- Vintage Source games like Team Fortress 2
- MTA:SA (Multi Theft Auto: San Andreas)
- Old-school MMOs like RuneScape private servers
The limiting factor is usually RAM, not CPU power. For Minecraft especially, allocate at least 1GB of RAM to the server.
Don’t forget to set up port forwarding on your router so friends can connect from outside your network. Each game uses different ports, so check the documentation.
Also, consider creating a static IP for your Pi or using a dynamic DNS service so your friends don’t need a new IP address every time they want to play.
Server Maintenance and Troubleshooting
A. Monitoring system performance and resources
Ever run your Pi server for a while and suddenly notice everything’s crawling along like a snail? You need to keep tabs on your system resources.
The simplest monitoring tool is already built in – just type top in your terminal. It’ll show you CPU usage, memory consumption, and which processes are hogging all your resources.
For something with a bit more visual appeal, try installing Htop:
sudo apt install htop
Want more comprehensive monitoring? Glances is your friend:
sudo apt install glances
For remote monitoring (checking on your Pi from another device), consider setting up Netdata. It gives you a beautiful web dashboard that tracks everything happening on your system in real-time.
bash <(curl -Ss https://my-netdata.io/kickstart.sh)
After installation, just access http://your-pi-ip:19999 from any browser on your network.
B. Temperature management for 24/7 operation
Your Raspberry Pi can get toasty when running 24/7, and excessive heat is the #1 killer of these little machines.
Check your Pi’s temperature anytime with this simple command:
vcgencmd measure_temp
A healthy operating temperature is between 30°C-65°C. Once you hit 70°C+, your Pi will start throttling performance to cool down.
Tips to keep your Pi cool:
- Get a case with built-in cooling – either passive (heatsinks) or active (fans)
- Position your Pi where air can circulate
- Avoid placing it near other heat-generating devices
- For serious server applications, consider a cooling hat with fans
If you’re noticing frequent overheating, you can also set up automatic fan control based on temperature thresholds.
C. Common problems and their simple solutions
Server running painfully slow? Here’s your quick troubleshooting guide:
| Problem | Simple Solution |
|---|---|
| Server unresponsive | Check power supply – use a 5V/2.5A+ adapter |
| Network connectivity issues | Verify ethernet connection or Wi-Fi settings |
| SD card corruption | Create regular backups using dd or Etcher |
| High CPU usage | Use top to identify resource-hungry processes |
| Services not starting | Check logs with journalctl -xe |
| Out of storage | Run df -h to check space, then sudo apt clean |
The most common issue with Pi servers is SD card failure. These cards aren’t designed for constant read/write operations. Consider moving your OS to an SSD for better reliability and performance.
D. When and how to safely reboot or shut down your server
Never just yank the power cord from your Pi! That’s asking for corrupted data.
The proper way to reboot your system:
sudo reboot
For a complete shutdown:
sudo shutdown -h now
Want to schedule a shutdown? Use:
sudo shutdown -h +30 # Shuts down in 30 minutes
Or set a specific time:
sudo shutdown -h 23:30 # Shuts down at 11:30 PM
To cancel a scheduled shutdown:
sudo shutdown -c
Need to restart after maintenance but don’t want to physically access your Pi? Set up a watchdog timer that automatically reboots if your server locks up:
sudo apt install watchdog
sudo systemctl enable watchdog
sudo systemctl start watchdog
Remember to close any important processes or databases before rebooting to prevent data corruption.

From Beginner to Server Admin: Your Raspberry Pi Journey
Setting up your own Raspberry Pi server is an empowering project that teaches valuable skills while creating a practical solution for your home or small business needs. By following this guide, you’ve learned how to select the right Raspberry Pi model, gather essential equipment, install an operating system, configure your network for remote access, and implement crucial security measures to protect your server. You’ve also explored popular server applications and gained insights into maintaining your system for optimal performance.
Whether you’re using your Raspberry Pi server for file sharing, media streaming, home automation, or as a learning platform, the knowledge you’ve gained provides a solid foundation for future tech projects. Remember that the Raspberry Pi community is vast and supportive, offering resources when you encounter challenges. Start small, experiment confidently, and watch your server capabilities grow alongside your technical expertise. Your Raspberry Pi server journey doesn’t end here—it’s just the beginning of your adventure in personal computing and networking.